Short, practical guides for the whole flow — from your first login to images live in your shop. Every guide is walked through with real screenshots of the product.
Create your account, log in, and get your bearings in the Shelfshoot portal — the home base for your images, settings and shop connections.
Sign up.Pick a plan on the pricing page and create your account. Your first 10 images are free — no card required.
Log in.Open shelfshoot.com/login and sign in with your email and password.
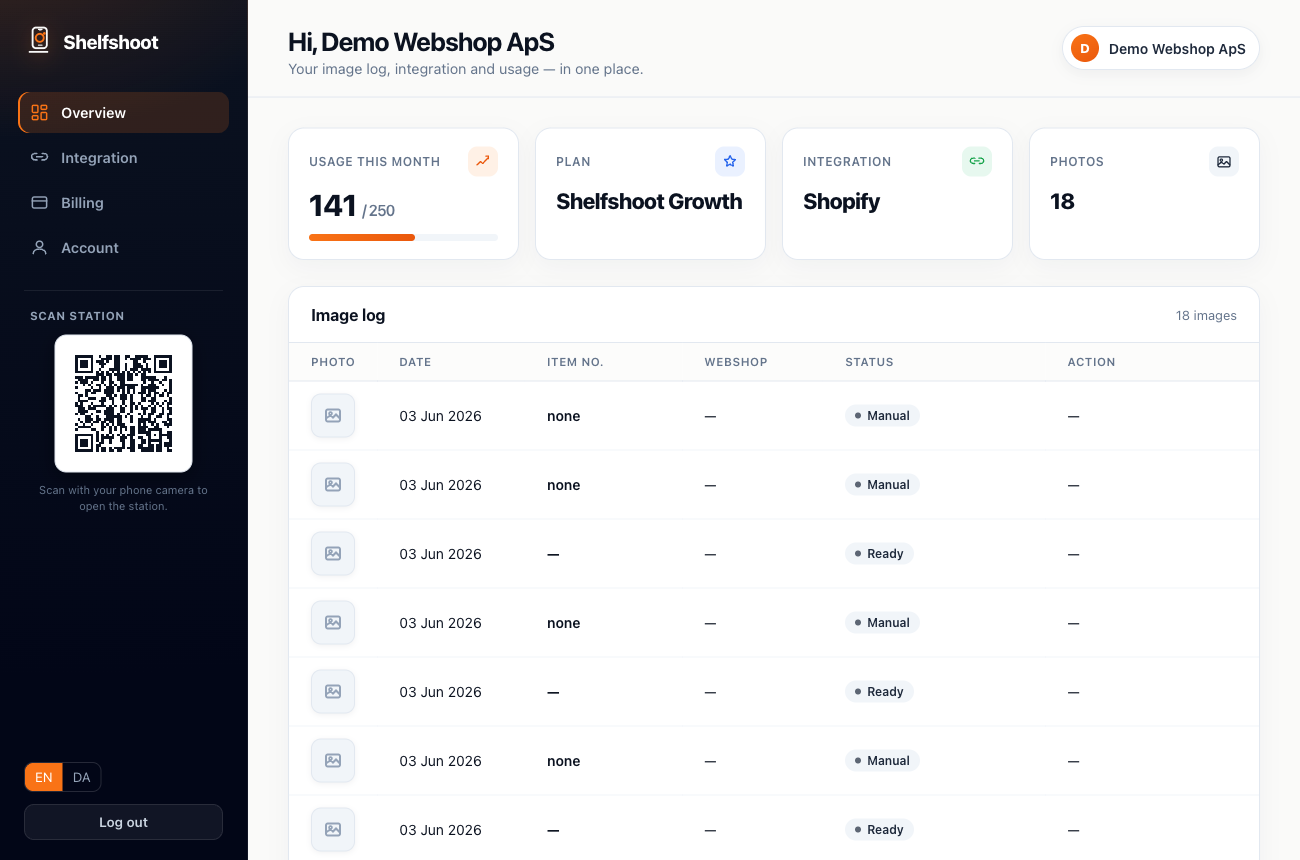
Meet the portal.The sidebar holds everything: the image log, your shop integration, account settings, usage, and the QR code that opens the scan station on your phone.
Using Shopify? You don’t need a Shelfshoot account. Install Shelfshoot from the Shopify App Store — you choose your plan and pay inside Shopify.The Shopify app →
Tip: the next step after signing in is connecting your shop — that's what lets matched images publish straight to your product pages.
shelfshoot.com/portal
The real portal — your image log, plan, usage and the scan-station QR, all on one screen.
2
The scan station
The scan station is the mobile app your warehouse team uses to capture products. It runs in the browser on any phone — scan a barcode, shoot the product, and the background is removed automatically.
Open it on your phone
Find the QR code.In the portal sidebar, under “Scan station”, point your phone camera at the QR code to open the station instantly — no app store needed.
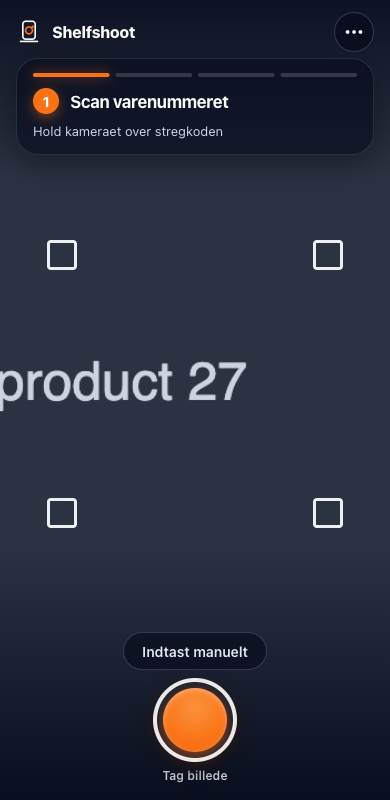
Scan the item number.Step ① asks you to hold the camera over the barcode to lock in the SKU. No barcode? Tap “Enter manually” and type the item number.
Tap the shutter.Frame the product inside the corner guides and tap the orange shutter. Shelfshoot removes the background, crops and exports a clean image automatically.
The real scan station: scan the item number, frame the product, tap to capture.
Mobile only. Add it to your home screen so it's one tap away — on iOS: open in Safari → Share → Add to Home Screen. On Android: accept the install prompt when it appears.
3
Connecting your shop
Connect your store so matched images can publish straight to the right product page. How you connect depends on your platform.
Shopify
Install the Shelfshoot app
Get the Shelfshoot app from the Shopify App Store and approve it for your store. The connection is handled for you — no keys to copy.
WooCommerce · Magento · Shopware · API
Add credentials in the portal
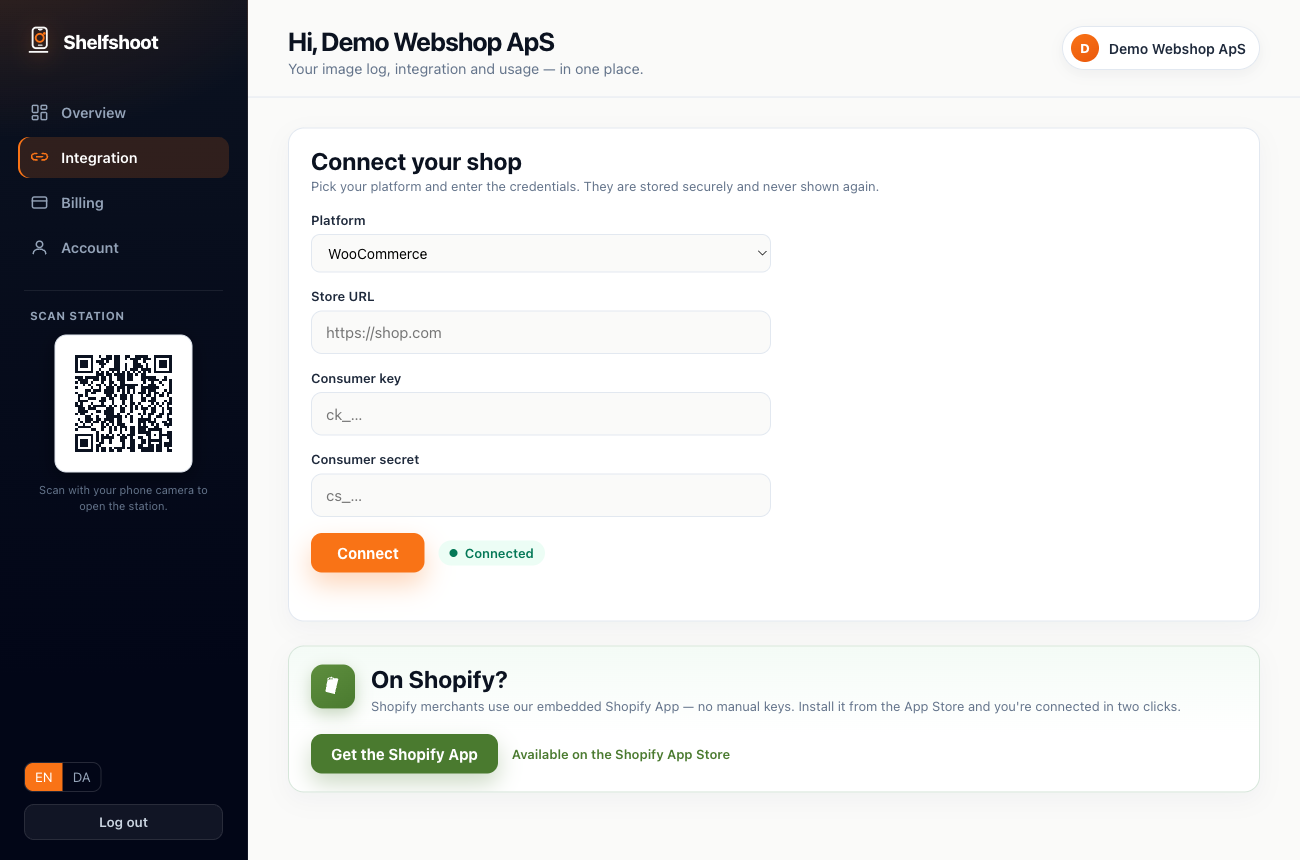
Open the Integration tab in the portal and paste your store URL and API credentials. Save, and Shelfshoot starts publishing to matched products.
shelfshoot.com/portal · Integration
The Integration tab — pick your platform, paste credentials, or grab the Shopify App in two clicks.
Your credentials are stored securely and used only to upload images to your store. Shelfshoot never writes anything else to your product data.
The Shopify app — step by step
Shopify is the quickest platform to connect — the app handles the connection, billing runs through Shopify, and there are no API keys to create or paste.
Install from the Shopify App Store.Find Shelfshoot on the Shopify App Store and install it on your store. No Shelfshoot account, password or API keys are needed.
Approve the permissions.Shopify shows the access Shelfshoot needs — read products and write product images — so photos can be attached to the right product.
Choose a plan in Shopify.Plans are selected and billed by Shopify, on your regular Shopify invoice. You can change or cancel your plan at any time from the app.
Open the scan station.In Shopify Admin, go to Apps → Shelfshoot. Scan the QR code with your phone, or click “Open on this device” to use this computer’s camera.
Scan the barcode — or choose the product.Point the camera at the product’s barcode and Shelfshoot finds the matching product by barcode or SKU. No barcode? Click “Choose a product instead” in the app and the next photo goes straight to that product.
Take the photo — it’s published.Shelfshoot removes the background and adds the image to the product in Shopify. Every photo appears in the image log inside the app, where you can retry a failed publish.
Selling on more than one store? Install the app once per store — each store has its own plan in Shopify. One phone can switch between your stores.
4
The image log & publishing
Every capture lands in the image log. Review the processed photos, then approve them to publish straight to your shop.
Open the image log.On the portal Overview, the image log lists every capture — photo, date, item number, webshop and status.
Check the status.“Ready” means the image is processed and matched; “Manual” means it needs an item number before it can publish. Click a row to inspect it full size.
Approve & upload.Use the row action to publish the image to its matched product in your connected shop.
Fix a match.If a photo has no item number, set it on the row to point it at the right SKU, then publish.
shelfshoot.com/portal · Image log
The image log — every capture with its status. Review, then Approve & upload to publish.
5
Watermark
Add your logo as a watermark and Shelfshoot overlays it on every processed image — consistent branding with zero extra steps.
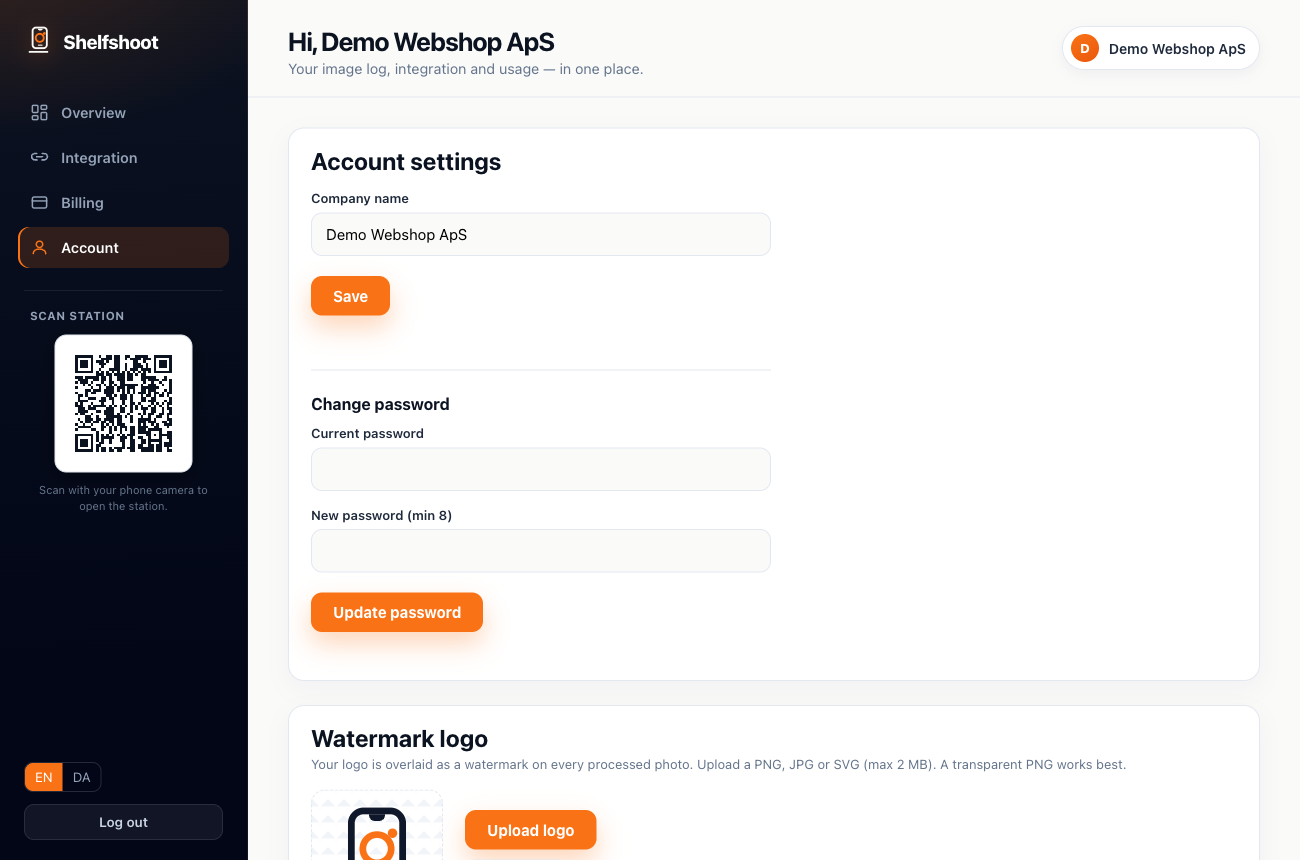
Go to Account.Open the Account tab in the portal sidebar and scroll to “Watermark logo”.
Upload your logo.Click “Upload logo” and pick a PNG, JPG or SVG (max 2 MB). A transparent PNG works best.
It's applied automatically.From then on the watermark is overlaid on every photo you process — no extra steps.
shelfshoot.com/portal · Account
The Account tab — upload your logo once and it watermarks every processed image.
6
Output image size
Choose the resolution Shelfshoot exports so your images fit your shop's product grid perfectly.
Open Account.Find the output size setting in the Account section.
Pick a size.Choose 1024, 1600, 2048, or set a custom square size.
Applies to new images.Every image you process from then on exports at your chosen size.
1024px
1600px
2048Default
CustomSquare
Pick 1024, 1600, 2048 or a custom square — set once in Account, applied to every new image.
7
Plans & billing
Shelfshoot is priced per image. Each plan includes a monthly image quota — pick the one that matches how many products you shoot.
Starter
A smaller monthly image quota for stores adding a steady trickle of new products.
GrowthPOPULAR
A larger monthly quota for busy warehouses photographing products at volume.
No rollover. Your image quota resets each month — unused images don't carry over. See live pricing and quotas on the pricing page.View pricing →Installed from the Shopify App Store? Your plan and usage are billed by Shopify — see Apps → Shelfshoot in Shopify Admin.
?
FAQ
Quick answers to the questions we hear most.
How good is the image quality?
Images are exported at your chosen output size (up to 2048px square) with the background removed cleanly and the product centred and cropped. Shoot in decent light and fill the frame for the sharpest results.
Which platforms are supported?
Shopify via the Shelfshoot app, plus WooCommerce, Magento and Shopware via API credentials in the Integration tab. Have your own system? Connect it through our API.
Where do my images go?
Every capture appears in the image log in your portal. When you approve one, it's uploaded to the matched product in your connected shop.
Can I use it on any phone?
Yes — the scan station runs in the browser on any modern iOS or Android phone. Open it from the QR code in the portal and add it to your home screen for one-tap access.
How do I cancel?
Manage your plan in the portal's billing section. You keep access until the end of your current billing period — no long-term lock-in.